The Isle of Lewis chess pieces are one of the proudest possessions of the British Museum and also the National Museum of Scotland, which shares the hoard discovered on Uig in 1831. They represent the oldest complete chess sets in the world, with only a few pawns and a rook missing from one set. Now the rook has turned up from a back drawer in a private home and Sotheby’s are estimating a potential sale price of £1 million. The Lewis pieces are made from Walrus tusk, known as morse ivory, and give valuable insights into the Viking civilisation and environment from which they sprang.
This week, a game by that modern Norwegian descendant of Vikings, the world champion Magnus Carlsen, played on the traditional Viking turf of Stavanger.
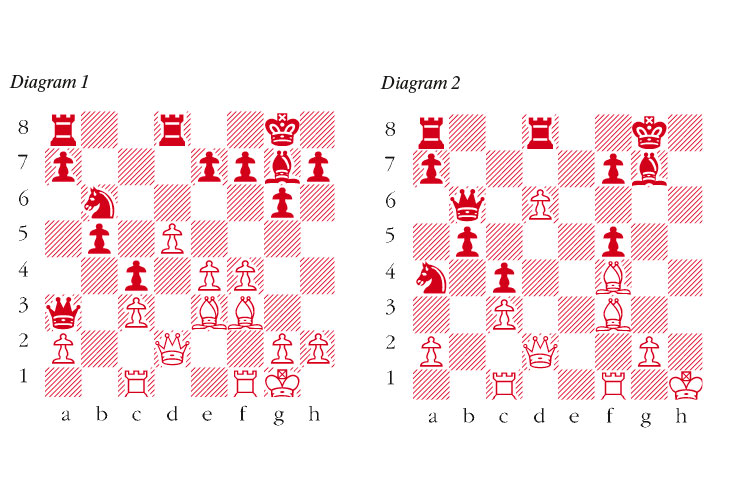
Carlsen-Grischuk: Stavanger 2019; Grünfeld Defence
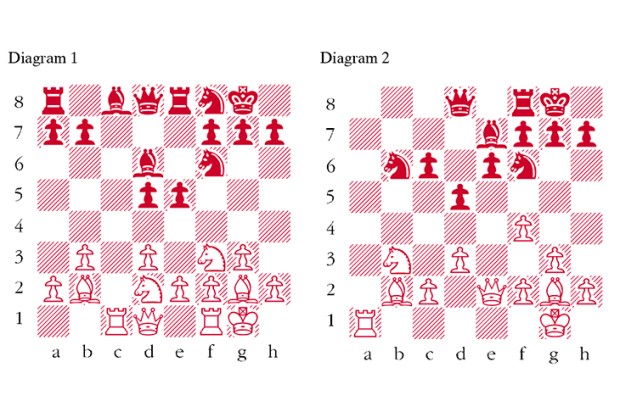
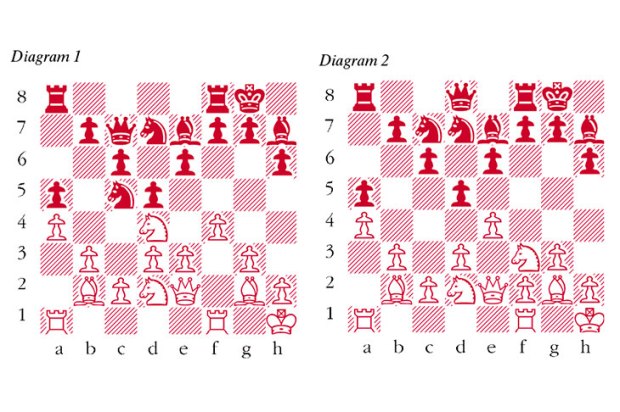
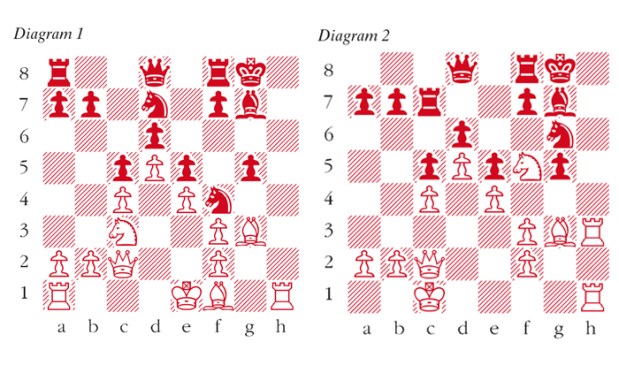
1 d4 Nf6 2 c4 g6 3 Nc3 d5 4 cxd5 Nxd5 5 e4 The most testing variation against the Grünfeld Defence. White establishes a huge pawn centre and speeds up his development. The main question is whether Black can snipe at White’s centre from the wings and dismantle it. 5 … Nxc3 6 bxc3 Bg7 7 Be3 c5 The standard undermining thrust. Without this Black’s counterplay would be swiftly stifled. 8 Rc1 Qa5 9 Qd2 0-0 10 Nf3 Bg4 11 d5 b5 It is more sensible to preface this with 11 … Nd7 and then 12 … b5. 12 Be2 Black’s previous move was largely bluff since 12 Bxc5 Rc8 13 Bd4 is advantageous for White. 12 … Nd7 13 0-0 Bxf3 14 Bxf3 c4 15 Be2 Rfd8 Natural enough but in fact varying from 15 … Qa3 which had been seen before. 16 f4 Nb6 More active is 16 … Qa3 followed by … Nc5. 17 Bf3 Qa3 (see diagram 1) 18 h4 As in so many of Carlsen’s most recent games we see here the influence of his study of one of the favourite strategies of AlphaZero. This ingenious product of DeepMind, orchestrated by Demis Hassabis CBE, is to thrust forward wing pawns, especially against the enemy king. 18 … e6 19 h5 Na4 Black diverts his troops towards an attack on c3 but the price he has to pay on the kingside is too great. Instead he should mobilise his forces with 19 … Rac8. 20 hxg6 hxg6 21 f5 exf5 22 exf5 Qd6 Black switches horses in midstream, recognising that if 22 … Nxc3 23 fxg6 fxg6 24 d6 and 22 … Bxc3 23 Qf2 are both very strong. 23 Bf4 Qb6+ 24 Kh1 gxf5 25 d6 (see diagram 2) The passed pawn bisects the board, cutting off Black’s queenside forces from the defence of his king. 25 … Rab8 26 Bd5 Nc5 27 Bg3 Ne6 The desperation sacrifice 27 … Rxd6 fails to 28 Bxd6 Qxd6 29 Bxf7+ winning the black queen. 28 Rxf5 Rxd6 29 Bxd6 Qxd6 30 Qe3 Qb6 31 Qf3 Rf8 32 Rf1 Nd8 33 Rh5 White’s massive build-up permits an easy switch to a devastating attack on the h-file. 33 … Qc7 34 Qe4 Black resigns
Got something to add? Join the discussion and comment below.
You might disagree with half of it, but you’ll enjoy reading all of it. Try your first month for free, then just $2 a week for the remainder of your first year.