The only official interregnum in the reigns of the world chess champions was that between the death of Alekhine in 1946 and the accession of Botvinnik in 1948. There is, however, an unofficial interregnum which occurred when Bobby Fischer won the world title in 1972 but did not play a serious game of chess as champion and forfeited the title without play to Karpov in 1975. At this point, step forward Mikhail Tal. According to statistician John Ellis in the August issue of the British Chess Magazine, it was Tal who filled the void created by Fischer’s disappearance. From July 1972 to April 1973, according to the BCM, Tal played a record 86 consecutive games without a loss, comprising 47 wins and 39 draws. Then he improved on this record between October 1973 and October 1974 when he played a further 95 consecutive games, again without loss, scoring 46 wins and 49 draws. John Ellis maintains that these remain the longest unbeaten streaks in modern grandmaster chess history.
This week’s game might be considered a homage to Tal, whose use of the Modern Benoni Defence has become legendary. This week’s puzzle gives one of the most famous Tal positions with this defence. The game below was played in the recently concluded Russian Championship, where Andreikin won ahead of Jakovenko after a rapid-play play-off.
Inarkiev-Dubov: Russian Championship, Satka 2018; Modern Benoni
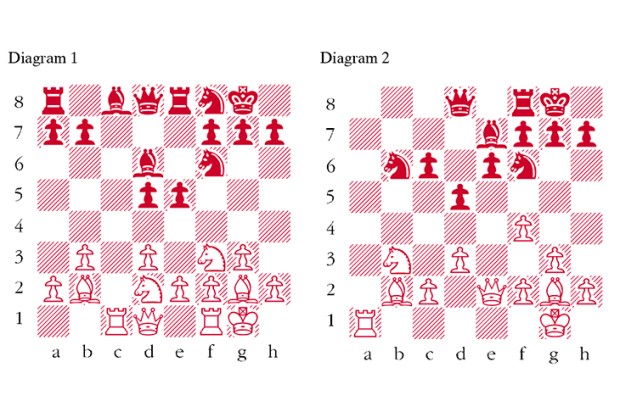
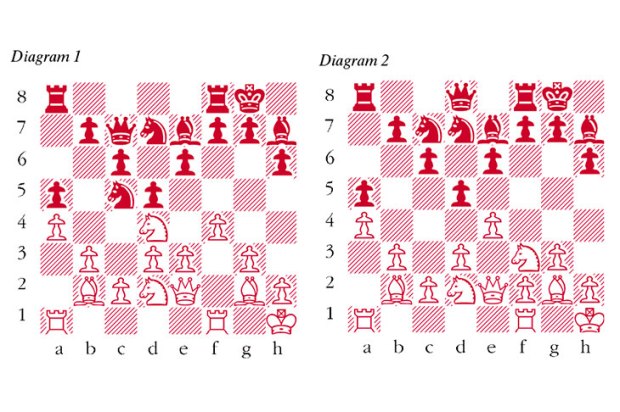
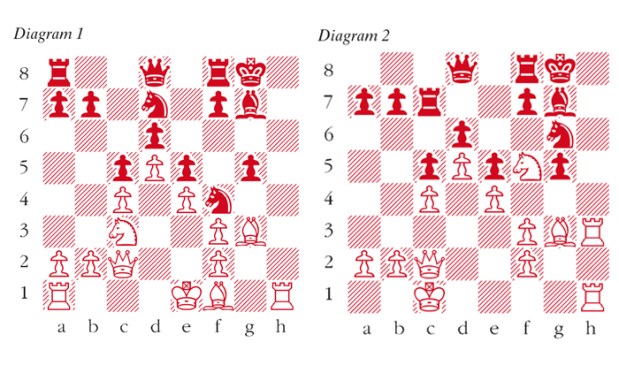
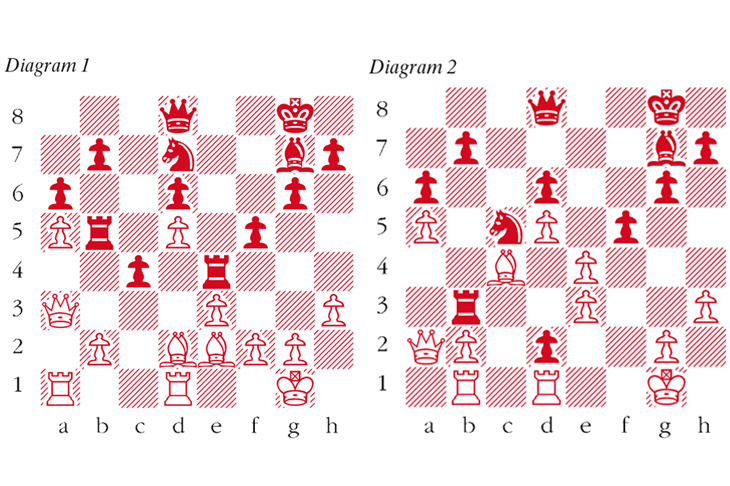
1 d4 Nf6 2 Nf3 g6 3 c4 Bg7 4 e3 0-0 5 Be2 c5 6 d5 White is eager to enter the contours of the Modern Benoni. However, in the main lines White can usually arrange to play e2-e4 in one move. With White’s e-pawn already on e3, many of White’s most promising options are excluded. 6 … e6 7 Nc3 exd5 8 cxd5 d6 9 0-0 Bg4 10 h3 Bxf3 11 Bxf3 Nbd7 12 Qc2 a6 13 a4 c4 One of the Modern Benoni themes is the activity Black can create by advancing his queenside pawn majority. The text also anchors a possible square for a black knight occupation on d3. 14 Be2 Rc8 15 a5 Rc5 16 Qa4 Re8 17 Rd1 Ne4 18 Nxe4 Rxe4 19 Bd2 f5 20 Qa3 Rb5 (see diagram 1) 21 Rab1 White misses his chance to exploit the eccentrically placed black rook on b5. He should instead try the amazing 21 b4! Bxa1 22 f3! Re8 23 Qxa1 when in spite of a slight material loss White enjoys a clear advantage. 21 … Rb3 22 Qa2 Nc5 23 f3 c3 24 fxe4 After this exaggerated display of voracity White succumbs to a Tal-like inferno. Instead 24 bxc3 is level. 24 … cxd2 25 Bc4 (see diagram 2) 25 … Qg5!! This further sacrifice is stunning but the mundane 25 … Rxe3 was also very strong. 26 Bxb3 Qxe3+ 27 Kh1 27 Kf1 Nxe4 and 27 Kh2 Be5+ both lead to mate. 27 … Nxe4 28 Rf1 As good or bad as anything else. White’s vast reservoir of extra material is irrelevant as none of it helps him to defend the dark squares. 28 … Be5 White resigns Mate follows shortly.
Got something to add? Join the discussion and comment below.
You might disagree with half of it, but you’ll enjoy reading all of it. Try your first month for free, then just $2 a week for the remainder of your first year.